Many of our customers enjoy a bit of DIY. While hiring a builder is often the best option for large projects, there’s something satisfying about doing it yourself. The process of building your own structure, whether it’s a small extension, barbecue, or pizza oven, is rewarding.
If you’ve never done it before, bricklaying might seem a bit intimidating. But don't worry! If you love the idea of building with your own hands, there’s no reason you can’t start now. In fact, with the right guidance and preparation, you’ll be able to complete your project safely and proudly.
We want to make sure you have everything you need to succeed. Whether you’re just starting out or are ready to dive in, we’ve created a simple, easy-to-follow guide with tips for beginners.
Request a quotePractice makes perfect
If bricklaying is new to you, we recommend starting with a practice project before you begin your main build. One of the best ways to practice is by building a small pyramid.
Start with four bricks at the bottom and reduce the number at the top. This helps you learn how to handle the mortar and bricks properly.
If you feel confident, you can jump straight into your project, but practicing first will definitely help you get comfortable with the process.
1 Prepare the site
Before you start laying bricks, you must prepare the site properly. Taking the time to set up a good work zone can make a huge difference in the quality of your build.
⦿ Clear the area Make sure there’s enough space to work, and keep the area free of debris.
⦿ Bring bricks close by Place the bricks you need near your working space, but don’t stack them too high. This reduces the risk of damaging them.
⦿ Elevate your bricks Stack the bricks on boards or pallets to keep them off the ground. If they sit directly on the ground, they can be affected by dampness and weather, which could cause damage.
2 Think about the foundation
A good foundation is the most important part of any bricklaying project. If you're working on a larger build, like an extension, you need a solid foundation or footing.
⦿ Dig deep The foundation should be below ground level. The exact depth and width will depend on the size of your build and the type of ground you’re working with.
⦿ Know the measurements For a single-story extension, a common depth is 200mm and a width of 450mm. Make sure you check what’s needed for your specific project. Larger builds might require planning permission.
Stack the bricks on boards or pallets to keep them off the ground. If they sit directly on the ground, they can be affected by dampness and weather
3 Mixing the mortar
Mortar is the glue that holds your bricks together. It’s a mixture of sand, cement, and water.
⦿ The right mix A typical mortar recipe includes four parts sand to one part cement. After mixing, add water to achieve the right consistency.
⦿ Optional additives You can add hydrated lime to make the mortar more flexible and easier to work with, but this isn’t necessary.
⦿ Mixing methods You can mix by hand or use a cement mixer. For larger projects, renting a mixer might be a good idea.

4 Consistency is key
Your mortar needs to be just the right consistency. It should not be too wet or too dry. Here’s how to achieve that perfect texture:
⦿ Mix slowly Add a little water at a time, mixing as you go. If the mixture is too thick, add a little more water.
⦿ Proper texture The mortar should be wet enough to slide off your trowel but not so wet that it oozes out and takes forever to dry.
5 Get the right amount of mortar
Don't mix too much mortar at once. You want to have enough to keep laying bricks, but not so much that it dries out before you can use it.
⦿ Mix for about an hour This will keep you from wasting mortar. On a hot day, you may need to mix smaller batches.
6 Apply the mortar
Once you’ve mixed the mortar, it's time to apply it.
⦿ Spread the mortar Using your trowel, scoop some mortar and spread it onto the brick. You’ll need to apply it to the face, edges, and one end of the brick.
⦿ Trench technique After spreading the mortar, use the point of your trowel at a 45° angle to create a small trench in the mortar. This will help it stick better when you press the brick into place.
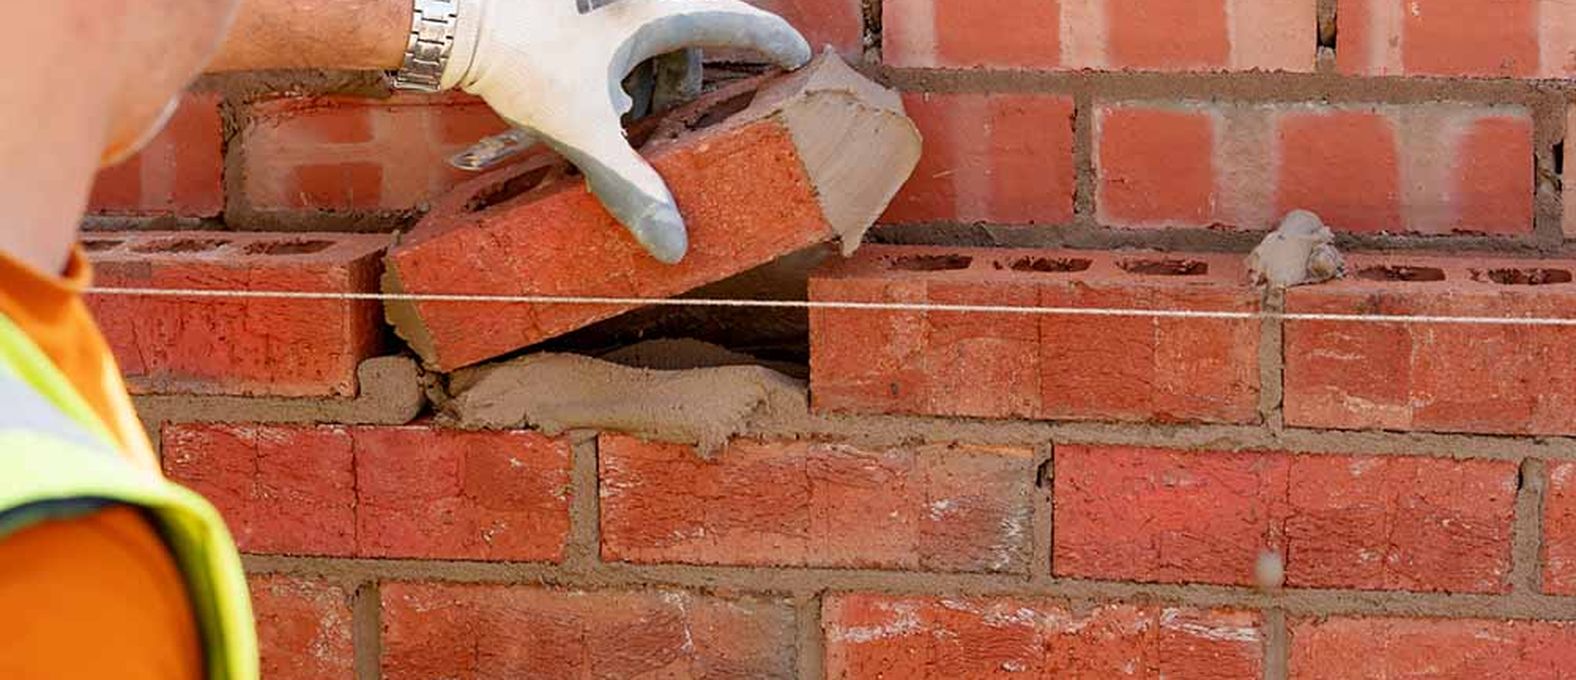
Each new row of bricks should overlap the row beneath it by half a brick. This creates a pattern called known as a stretcher or running bond
7 Lay the bricks
When you start laying the bricks, follow these steps to ensure a strong and even wall.
⦿ Stagger the joints Each new row of bricks should overlap the row beneath it by half a brick. This creates a pattern called known as a stretcher or running bond.
⦿ Position the bricks carefully Place each brick and gently push it into place. Tap it lightly with your trowel to ensure it's snug. Use a spirit level to make sure each course is straight and level.
⦿ Check vertical alignment Make sure your wall stays plumb (straight up and down) as you build.
8 Finishing touches
Bricklaying is a skill that gets easier with time, but you should always take your time, especially in the beginning.
⦿ Take it slow Don’t rush through the process. If you try to go too quickly, you might make mistakes that will take more time to fix later.
⦿ Clean up After a day’s work, clean off any excess mortar from your bricks using a trowel. If the mortar joints aren’t flush, feel free to add a bit more mortar.
Additional tips for success
To ensure your bricklaying project goes smoothly, here are a few more tips:
⦿ Weather considerations If it's too hot, the mortar may dry out too quickly. If it's cold and damp, it may take too long to dry. Try to work in ideal weather conditions when possible.
⦿ Safety first Always wear protective gear such as gloves, safety glasses, and sturdy footwear. Bricklaying can involve heavy lifting, so take breaks when needed.
⦿ Choose the right bricks and buy the right amount - and remember, we're here to help you figure out how many bricks you need!
We're here to help you succeed
Whatever stage you're at, we're here to support you with our range of specialist services. We can help you find the best bricks at affordable prices and offer advice on what tools you might need.
If you need assistance, our expert Brick Advisors are ready to assist. They can help you select the right bricks, calculate how many you'll need, and arrange for delivery to your location.